Proxmark3 复制IC/ID卡
环境
系统: macOS 10.14.5
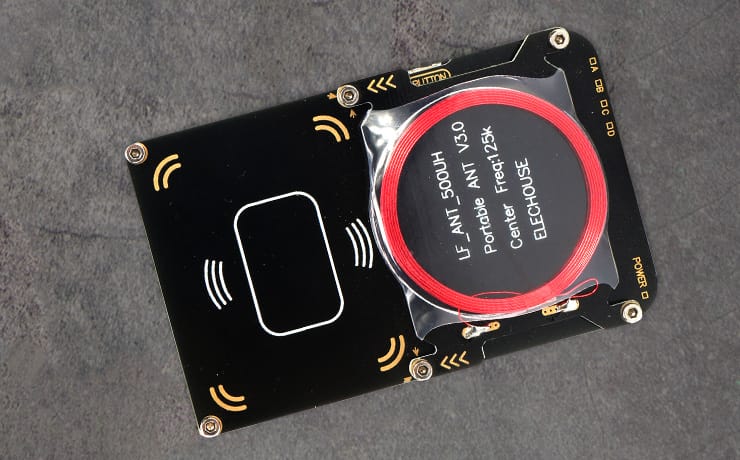
硬件: Proxmark3 Easy
前言
Proxmark3是一个开源RFID嗅探读取以及克隆的工具。本文主要记录复制IC / ID卡。
RFID简介
RFID(Radio Frequency Identification),中文翻译为射频识别,又称无线射频识别,是一种通信技术,可通过无线电讯号识别特定目标并读写相关数据,而无需识别系统与特定目标之间建立机械或光学接触。 目前RFID技术应用很广,如图书馆、门禁系统、停车场等,安卓手机上常用的 NFC 技术实际上也是 RFID的一个子集。
RFID 按照工作频率的不同,可以分为低频(LF)、高频(HF)、超高频(UHF)等不同种类。目前国际上广泛采用的频率分布于4种波段,低频(125KHz)、高频(13.54MHz)、超高频(850MHz~910MHz)和微波(2.45GHz)。
卡片类型
| 类型 | 简称 | 频率 | 特性 |
|---|---|---|---|
| Mifare S50 | M1 | 高频 | 最常见的卡,每张卡有独一无二的UID号,可保存修改数据,常见学生卡,饭卡,公交卡,门禁卡 |
| Mifare UltraLight | M0 | 高频 | 低成本卡,出厂固化UID,可储存修改数据,常见地铁卡,公交卡 |
| Mifare UID | UID | 高频 | M1卡的变异版本,可修改UID,国外叫做中国魔术卡,可以用来克隆M1 S50的数据 |
| EM4XX | ID | 低频 | 常用固化ID卡,出厂固化ID,只能读不能写(低成本门禁卡,小区门禁卡,停车场门禁卡) |
| T5577 | 可修改ID | 低频 | 可用来克隆ID卡,出厂为空卡,内有扇区也可存数据,个别扇区可设置密码 |
| HID ProxⅡ | HID | 低频 | 美国常用的低频卡,可擦写,不与其他卡通用 |
M1卡
M1卡分为16个扇区,每个扇区4块(块0~3),共64块,按块号编址为0~63。第0扇区的块0(即绝对地址0块)用于存放厂商代码,已经固化,不可更改。其他各扇区的块0、块1、块2为数据块,用于存贮数据;块3为控制块,存放密码A、存取控制、密码B。每个扇区的密码和存取控制都是独立的,可以根据实际需要设定各自的密码及存取控制。
EM4XX卡
没有什么数据存储和加密,只有一个简单的5字节 EM TAG ID 数据,即这张卡的 ID。
环境配置
brew tap proxmark/proxmark3
brew install proxmark3
连接设备
proxmark3 /dev/cu.usb****
cu.usb替换为自己设备
测试一下电压
proxmark3> hw tune
Measuring antenna characteristics, please wait.........
# LF antenna: 60.50 V @   125.00 kHz
# LF antenna: 64.07 V @   134.00 kHz
# LF optimal: 74.52 V @   129.03 kHz
# HF antenna: 19.39 V @    13.56 MHz
Displaying LF tuning graph. Divisor 89 is 134khz, 95 is 125khz.
复制ID卡
先搜索低频信号
proxmark3> lf search
*
*
EM410x pattern found:
EM TAG ID      : 000053BC28 //ID卡号,这个抄下来,如果是HID卡会显示HID
Unique TAG ID  : 000000280A
*
*
我们读取到了卡的ID,然后拿出空白卡放在低频区写入。
proxmark3> lf em4x em410xwrite 000053BC28 1 64
Writing T55x7 tag with UID 0x000053BC28 (clock rate: 64)
写完验证下卡id是否一致
proxmark3> lf search
*
*
EM410x pattern found:
EM TAG ID      : 000053BC28
复制IC卡
搜索高频信号
proxmark3> hf search

 UID : f4 16 f1 ca
ATQA : 00 04
 SAK : 08 [2]
TYPE : NXP MIFARE CLASSIC 1k | Plus 2k SL1
proprietary non iso14443-4 card found, RATS not supported
No chinese magic backdoor command detected
Prng detection: WEAK

Valid ISO14443A Tag Found - Quiting Search
获取0扇区密钥
尝试扫描默认密码
proxmark3> hf mf chk *1 ? t
No key specified, trying default keys
chk default key[ 0] ffffffffffff
chk default key[ 1] 000000000000
chk default key[ 2] a0a1a2a3a4a5
chk default key[ 3] b0b1b2b3b4b5
chk default key[ 4] aabbccddeeff
chk default key[ 5] 4d3a99c351dd
chk default key[ 6] 1a982c7e459a
chk default key[ 7] d3f7d3f7d3f7
chk default key[ 8] 714c5c886e97
chk default key[ 9] 587ee5f9350f
chk default key[10] a0478cc39091
chk default key[11] 533cb6c723f6
chk default key[12] 8fd0a4f256e9
--sector: 0, block:  3, key type:A, key count:13

*
*
*

--sector:15, block: 63, key type:B, key count:13
Found valid key:[ffffffffffff]
Found keys have been transferred to the emulator memory
如果扫不到尝试PRNG漏洞获取0扇区密钥
proxmark3> hf mf mifare
*
*
Key found:ffffffffffff

Found valid key:ffffffffffff
检测0扇区秘钥
proxmark3> hf mf chk 0 A ffffffffffff
chk key[ 0] ffffffffffff

Found valid key:[0:A]ffffffffffff

# 如果错误会提示
No valid keys found.
获得全部秘钥
proxmark3> hf mf nested 1 0 A ffffffffffff
Testing known keys. Sector count=16
nested...
Time in nested: 4.330 (inf sec per key)

-----------------------------------------------
Iterations count: 0


|---|----------------|---|----------------|---|
|sec|key A           |res|key B           |res|
|---|----------------|---|----------------|---|
|000|  ffffffffffff  | 1 |  ffffffffffff  | 1 |
|001|  ffffffffffff  | 1 |  ffffffffffff  | 1 |
|002|  ffffffffffff  | 1 |  ffffffffffff  | 1 |
|003|  ffffffffffff  | 1 |  ffffffffffff  | 1 |
|004|  ffffffffffff  | 1 |  ffffffffffff  | 1 |
|005|  ffffffffffff  | 1 |  ffffffffffff  | 1 |
|006|  ffffffffffff  | 1 |  ffffffffffff  | 1 |
|007|  ffffffffffff  | 1 |  ffffffffffff  | 1 |
|008|  ffffffffffff  | 1 |  ffffffffffff  | 1 |
|009|  ffffffffffff  | 1 |  ffffffffffff  | 1 |
|010|  ffffffffffff  | 1 |  ffffffffffff  | 1 |
|011|  ffffffffffff  | 1 |  ffffffffffff  | 1 |
|012|  ffffffffffff  | 1 |  ffffffffffff  | 1 |
|013|  ffffffffffff  | 1 |  ffffffffffff  | 1 |
|014|  ffffffffffff  | 1 |  ffffffffffff  | 1 |
|015|  ffffffffffff  | 1 |  ffffffffffff  | 1 |
|---|----------------|---|----------------|---|
接下来导出密钥
proxmark3> hf mf nested 1 0 A ffffffffffff d
Testing known keys. Sector count=16
nested...
Time in nested: 4.302 (inf sec per key)

*
*
*

Printing keys to binary file dumpkeys.bin...
导出后会在目录生成一个文件dumpkeys.bin
导出数据
proxmark3> hf mf dump
|-----------------------------------------|
|------ Reading sector access bits...-----|
|-----------------------------------------|
*
*
*
Dumped 64 blocks (1024 bytes) to file dumpdata.bin
导出后会在目录生成一个文件dumpdata.bin
写卡
由于proxmark3不能使用bin文件,所以需要转换成eml格式
proxmark3> script run dumptoemul.lua
--- Executing: dumptoemul.lua, args ''
Wrote an emulator-dump to the file F416F1CA.eml

-----Finished
会生成一个以uid命名的eml文件
写入空白卡
proxmark3> hf mf cload F416F1CA
No chinese magic backdoor command detected
Loading magic mifare 1K
Loaded from file: F416F1CA.eml
如果是cuid卡,则不需要转换eml
proxmark3> hf mf restore
Restoring dumpdata.bin to card
Writing to block   0: 00 00 00 00 00 00 00 00 00 00 00 00 00 00 00 00
#db# WRITE BLOCK FINISHED
isOk:01
写完验证下卡uid是否一致
proxmark3> hf search

 UID : f4 16 f1 ca
升级固件
克隆项目到本地 https://github.com/Proxmark/proxmark3
然后直接编译
make clean && make all
刷机
./client/flasher /dev/cu.usb###### -b bootrom/obj/bootrom.elf armsrc/obj/fullimage.elf
刷机过程
Loading ELF file 'bootrom/obj/bootrom.elf'...
Loading usable ELF segments:
0: V 0x00100000 P 0x00100000 (0x00000200->0x00000200) [R X] @0x94
1: V 0x00200000 P 0x00100200 (0x00000c84->0x00000c84) [R X] @0x298

Loading ELF file 'armsrc/obj/fullimage.elf'...
Loading usable ELF segments:
0: V 0x00102000 P 0x00102000 (0x0002ea90->0x0002ea90) [R X] @0x94
1: V 0x00200000 P 0x00130a90 (0x000018e4->0x000018e4) [RW ] @0x2eb24
Note: Extending previous segment from 0x2ea90 to 0x30374 bytes

Waiting for Proxmark to appear on /dev/cu.usb###### .
 Found.
Entering bootloader...
(Press and release the button only to abort)
Waiting for Proxmark to appear on /dev/cu.usb###### ....
 Found.

Flashing...
Writing segments for file: bootrom/obj/bootrom.elf
 0x00100000..0x001001ff [0x200 / 1 blocks]. OK
 0x00100200..0x00100e83 [0xc84 / 7 blocks]....... OK

Writing segments for file: armsrc/obj/fullimage.elf
 0x00102000..0x00132373 [0x30374 / 386 blocks]..... OK

Resetting hardware...
All done.

Have a nice day!